
One of the most important concepts in ManicTime is tagging. Here’s the basic idea:
- ManicTime tracks your computer usage - what applications you use, which documents you work on, and for how long.
- This data appears visually on timelines.
- You can then select a portion of time and assign it to a task (or tag it).
In this post, we’ll focus on number 2. and the different ways you can select time in ManicTime.
Ways to Select Time
You can select time in several ways:
- By dragging on the timelines (the visual representation of tracked activity)
- In the Details and Summary grids below the timelines
- By using the screenshot viewer
As we will see you can even combine both methods for more flexible selections.

Selecting Time on the Timeline
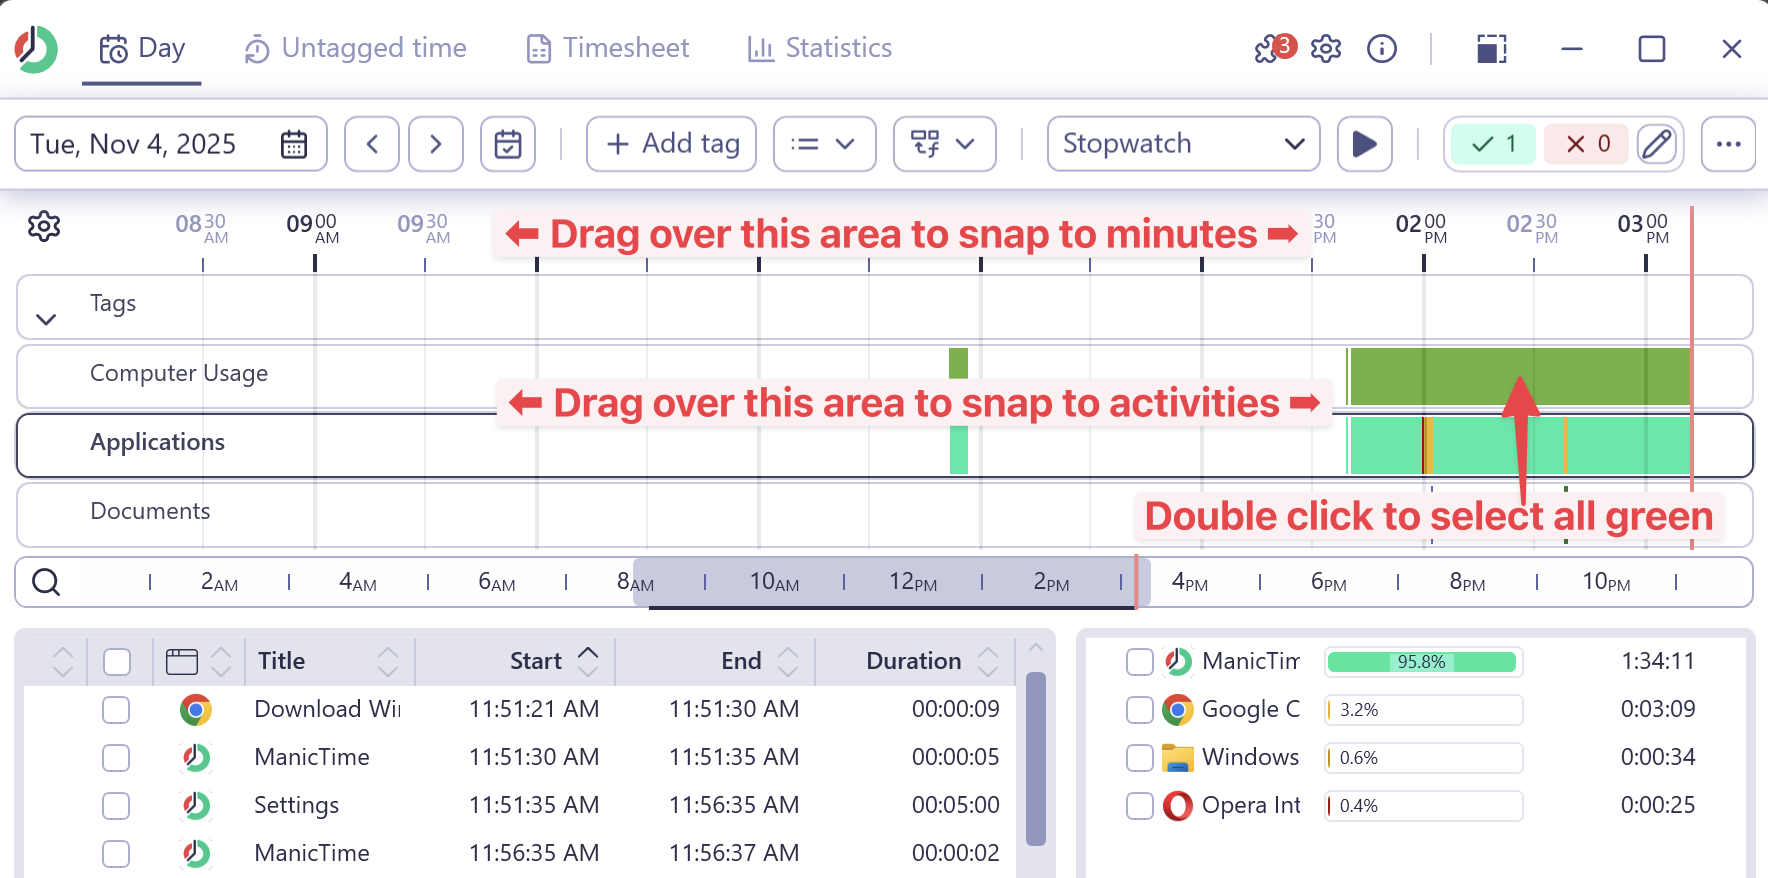
The most straightforward way to select time is by dragging directly on the timeline.
- Drag to select: Click and drag over the timeline to highlight a time range. While dragging, you can move across different timelines - the cursor will snap to the end of activities underneath, keeping your selection accurate and easy to control. If you drag over the time timeline, time will snap to full minutes.
- Double-click to select: Double-click on any tracked activity (for example, "Active Computer Usage") to select that entire time block.
- Multiple selections: Hold down CTRL while dragging to make multiple separate time selections.
Selecting Time in the Activity Grid
Below the timelines, you’ll find Details and Summary grids that list applications and activities. You can select time here using checkboxes.
- On the bottom-left, you can check individual activities.
- On the bottom-right, you can check all usage of one application at once.
You can even check boxes across different timelines - for example, one on the Computer usage timeline and another on the Applications timeline. To switch between timelines while selection is active use buttons on the left side of timelines.

A few examples
Let's go over a few more complex scenarios:
⸻
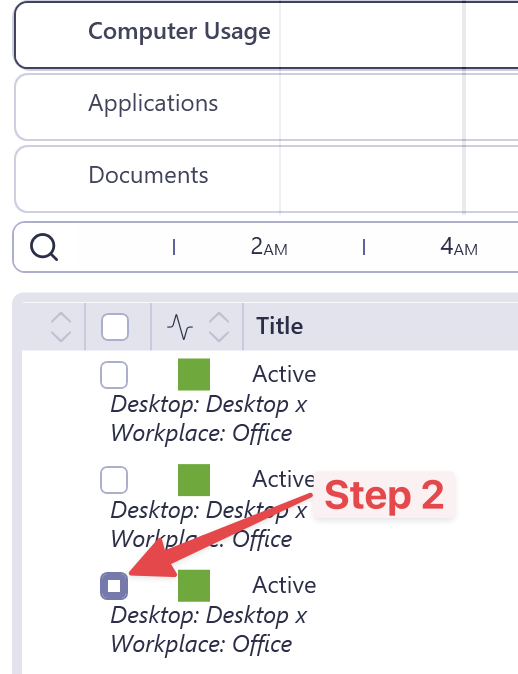
Example 1: Select All Active Time Except Chrome
- Click on the Computer usage timeline to select it.
- Check one Active time entry.
- Click on the small area to the left of the timeline to switch to another timeline (while keeping your selection active).
- On the bottom-right, uncheck Chrome usage.

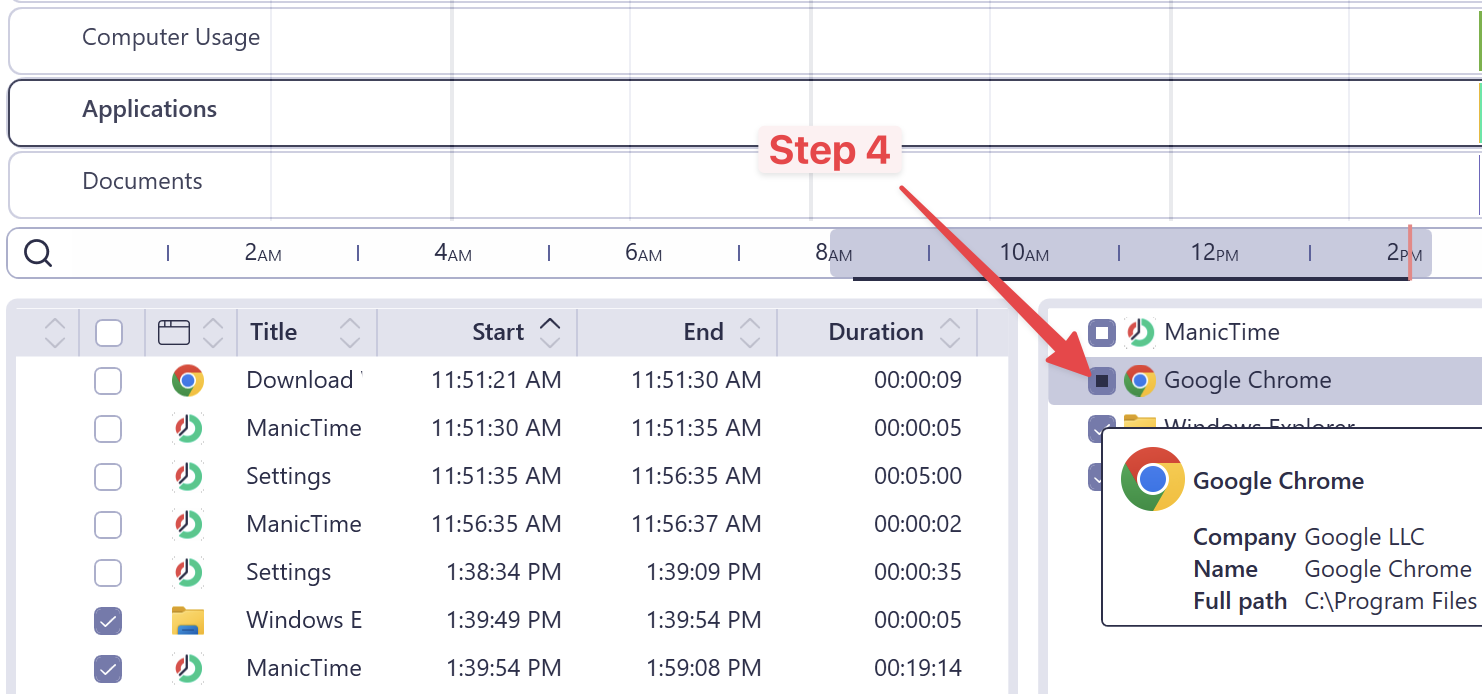
Now you’ve selected all active time except Chrome.
⸻
Example 2: Select Time When "ManicTime" or "YouTube" Appears in Titles
- Click on the Applications timeline.
- In the filter box below, type manictime and check all results.
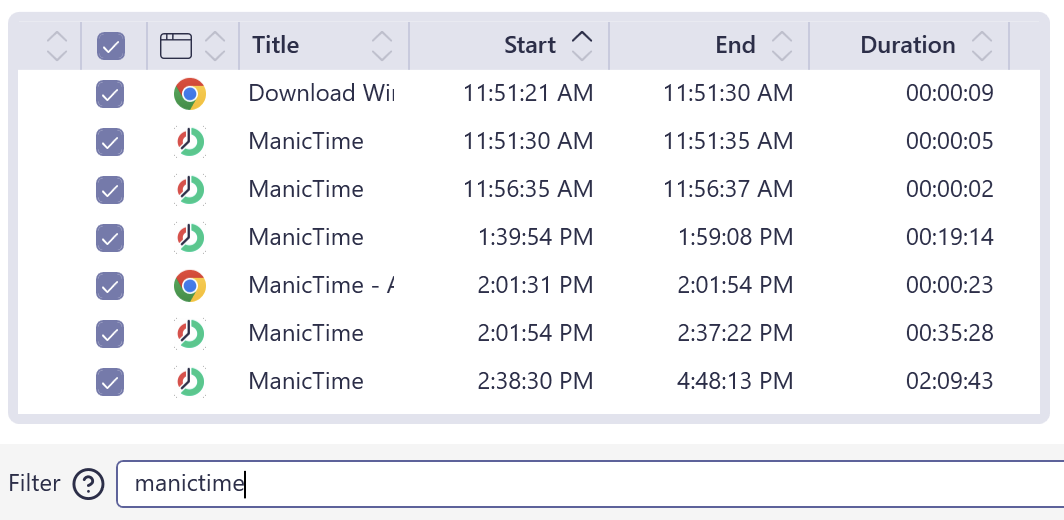
- Then type youtube and again check all results.

Notice that when you clear the filter, the checked items remain selected. This makes it easy to combine multiple filters or keywords.

⸻
Example 3: Select All "New Tab - Google Chrome" Titles
- Find an activity with the title "New Tab - Google Chrome."
- Double-click it.
ManicTime will automatically generate a filter like:
title="New Tab - Google Chrome"

- Now check all items and clear the filter - all "New Tab - Google Chrome" sessions are selected.
Mixing Timeline and Grid Selections
You can freely combine timeline selections with checked activities.
For example:
- Drag to select time on the timeline.
- Then uncheck Chrome in the Summary grid.
Your selection will now include all time except Chrome.
Making selections with screenshots
You can also make selections from the screenshot viewer.
- Move your mouse over the timelines to the point where you want your selection to start, then press F11 (Freeze Screenshot). This opens the screenshot viewer and shows the corresponding screenshot.
- Use the Left and Right Arrow keys to move through the screenshots.
- To start a time selection, hold down Shift or Ctrl and use the arrow keys to extend your selection. Keep holding Shift or Ctrl until you reach the end of the time you want selected.
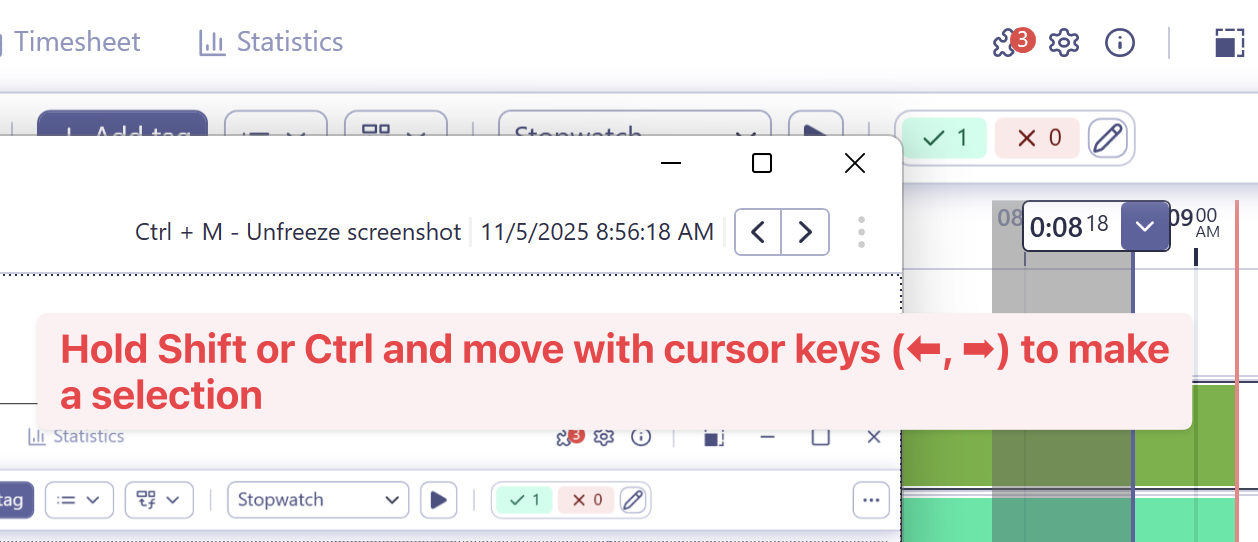
This method is especially useful when you want to visually confirm what you were doing at a specific moment while selecting your time.
Works the Same in the Cloud UI
Everything described here works the same in the ManicTime Cloud UI:
- Drag to select time
- Switch between timelines while keeping your selection active
- Use filters and check/uncheck activities
Going Further: Autotags
If you want to take time selection to the next level, check out Autotags. Autotags let you automatically label time based on rules and patterns - saving you even more manual work.
Final Thoughts
ManicTime offers a lot of flexibility when it comes to selecting and organizing your time. Whether you’re dragging on the timeline, filtering activities, or combining multiple selections, the system is designed to make tracking your work both fast and intuitive.