In our previous post, we showed how ManicTime can expose local activity data to AI tools through the built-in MCP server in the desktop client.
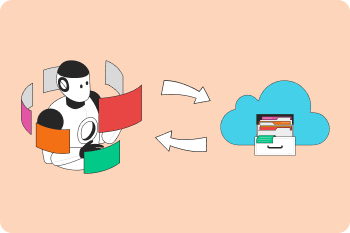
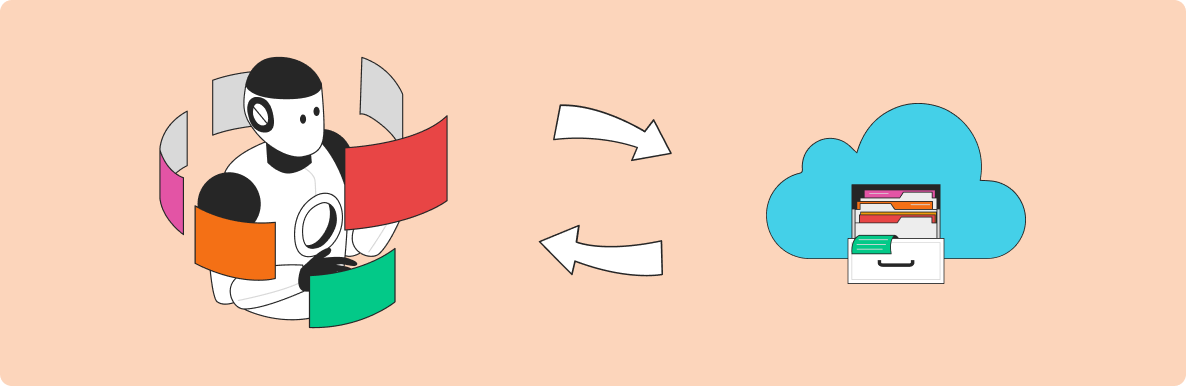
ManicTime Cloud also supports MCP, which means you can connect AI tools directly to your cloud workspace and let them query time-tracking data without going through the local desktop executable.
This article shows how to connect ChatGPT, Claude, and other MCP-compatible tools to ManicTime Cloud.
Why use Cloud MCP
Cloud MCP connects your AI tool directly to your ManicTime Cloud workspace.
Use it when your data is already in ManicTime Cloud and your AI tool supports remote MCP servers with OAuth.
What you need
Before you start, you need:
- a ManicTime Cloud account
- your ManicTime Cloud workspace URL
- access to the Developer page in ManicTime Cloud
- an AI tool that supports remote MCP servers with OAuth
Your ManicTime Cloud MCP server URL looks like this:
https://cloud.manictime.com/<your-cloud-id>/mcp
The <your-cloud-id> part is different for every account. It is part of your normal ManicTime Cloud URL, so the easiest way to find it is simply to look at the address bar while you are logged in.
Connect ChatGPT to ManicTime Cloud MCP
Open ChatGPT and go to:
Settings → Apps → Create app
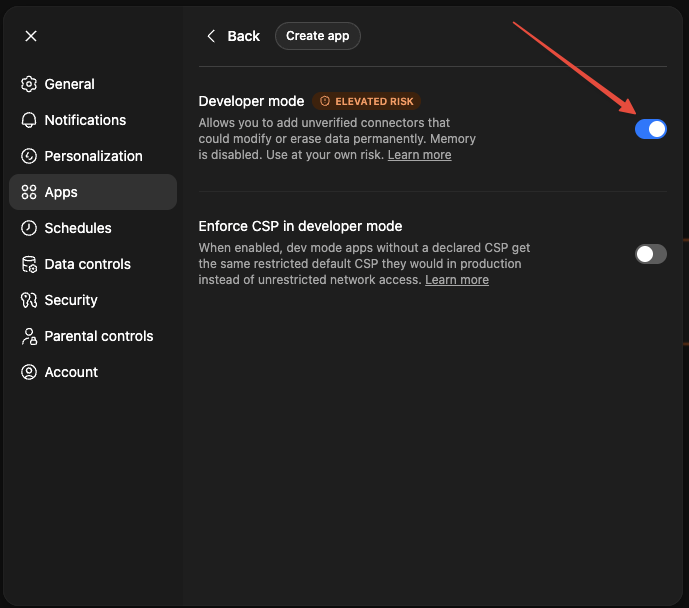
First you need to enable Developer mode.
Then click on Create app. Fill in:
- Name:
ManicTime - MCP Server URL:
https://cloud.manictime.com/<your-cloud-id>/mcp - Authentication:
OAuth
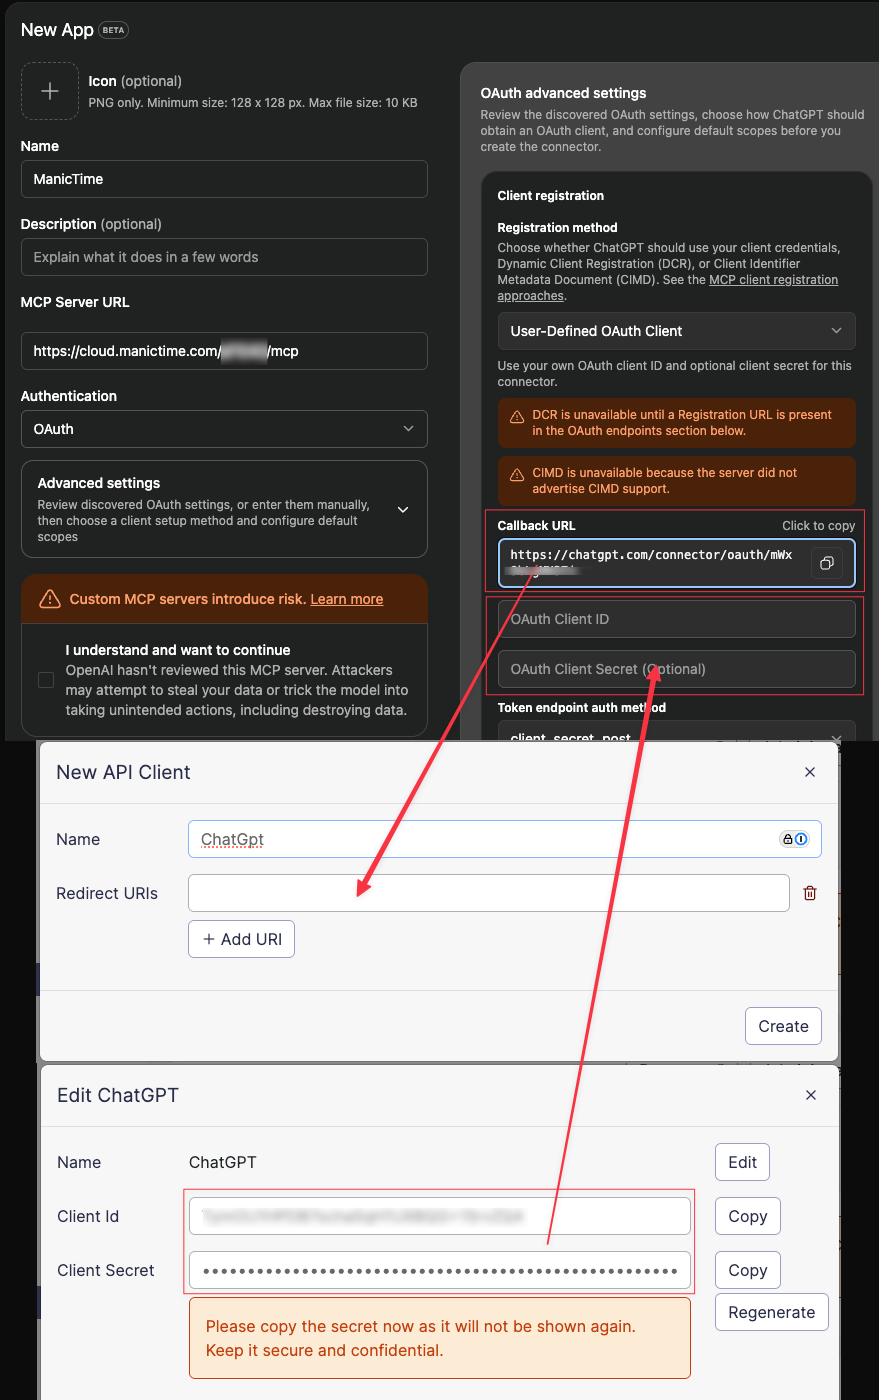
Under advanced authentication settings, ChatGPT will show a callback URL (seen on the image below). Copy it so you can then use it on Developer page.
Now switch to ManicTime Cloud and go to Developer page:
- Single-user accounts: bottom-left menu → My profile → Developer
- Team accounts: bottom-left menu → Users and subscriptions → Developer
On the Developer page:
- Create a new client.
- Paste the callback URL provided by ChatGPT.
- Save the client.
- Copy the generated Client ID and Client Secret.
Then go back to ChatGPT and paste:
- Client ID
- Client Secret
Click Create.
After that, ChatGPT should be able to complete OAuth and connect to your ManicTime Cloud MCP server.
Connect Claude to ManicTime Cloud MCP
Claude also supports remote MCP servers with OAuth.
To add a connector go to https://claude.ai/customize/connectors
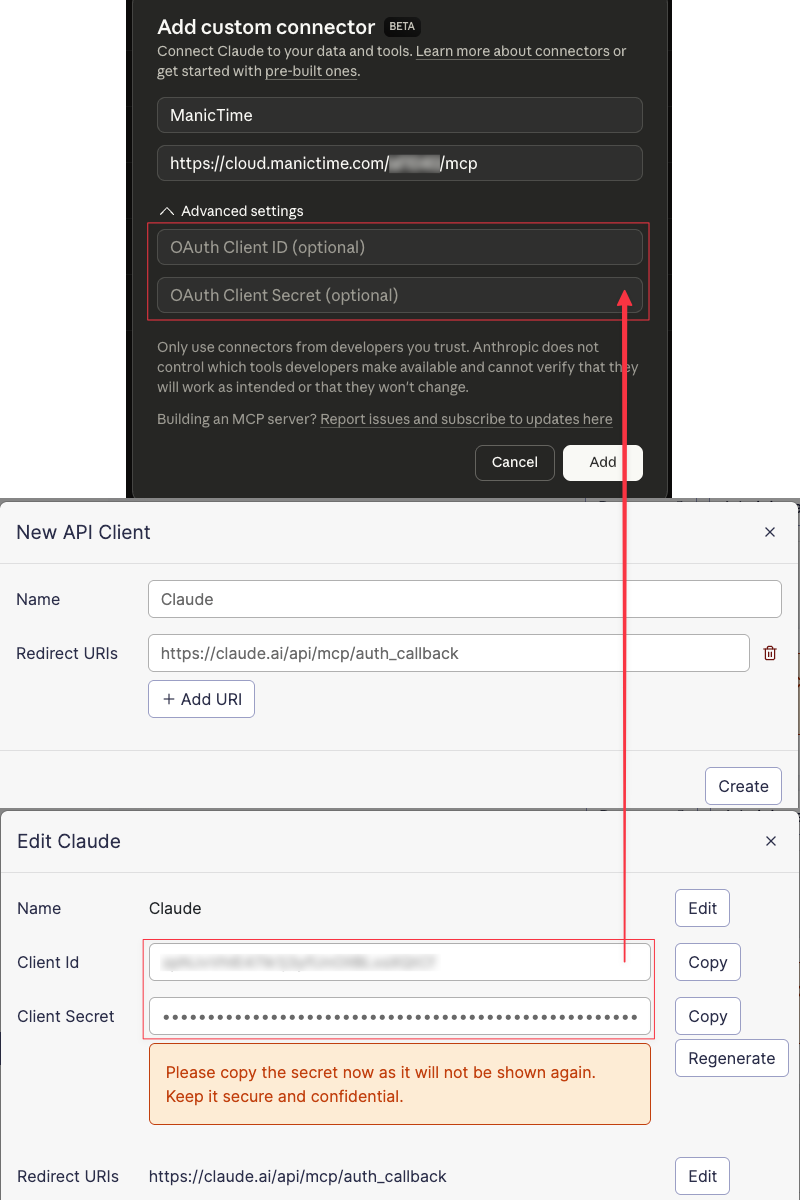
- Click on +, then "Add Custom connector"
- Fill in:
- Name:
ManicTime - MCP Server URL:
https://cloud.manictime.com/<your-cloud-id>/mcp
- Now switch to ManicTime Cloud and go to Developer page:
- Single-user accounts: bottom-left menu → My profile → Developer
- Team accounts: bottom-left menu → Users and subscriptions → Developer
- On the Developer page, create a new client.
- For callback URL use: https://claude.ai/api/mcp/auth_callback (unlike ChatGPT, Claude does not display the callback URL automatically, so you need to enter it manually)
- Save the client.
- Copy the generated Client ID and Client Secret.
Then go back to Claude and paste:
- Client ID
- Client Secret
Click Create.
Connect other MCP-compatible AI tools
The same pattern works for any AI tool that supports:
- a remote MCP server URL
- OAuth authentication
- a custom callback URL
The setup is always the same:
- Start creating a new MCP connection in the AI tool.
- Enter your ManicTime Cloud MCP URL.
- Choose OAuth.
- Copy the callback URL the tool provides.
- In ManicTime Cloud, create a new OAuth client with that callback URL.
- Paste the client ID and client secret back into the AI tool.
- Complete the OAuth flow.
What you can do once connected
Once the connection is active, your AI tool can query data from ManicTime Cloud through MCP.
Examples:
- "Are ManicTime tools available to you?"
- "How much time did I work yesterday?"
- "Which projects did I spend the most time on this week?"
- "Show me all tagged and untagged work from Monday."
- "Summarize my support work for today."
Depending on the MCP client and the permissions you allow, the AI can also help write data back, for example by saving tags.
Wrapping up
Once the app is created and OAuth is complete, ManicTime MCP should appear as a connected app in your AI tool.
From there, you can start asking questions about your tracked work immediately.
For detailed setup instructions, see our documentation.
If you build a useful workflow with ManicTime Cloud MCP, we'd love to hear about it.